How to Fix a Broken Charger Port on Your Phone or Laptop
Has your phone suddenly stopped charging? You might have a broken charger port, which can be a real headache. Take my wife’s case, who recently had her phone stop charging out of nowhere. After trying a new cable and cleaning the port, she got her device back in working order with just a few simple steps.
In this article, we’ll show you how to fix a broken charger port on your phone so you can get back to using it without buying an entirely new device.
Contents
- 1 What may cause my Charger port to Malfunction?
- 2 Tools Necessary for Fixing a Charging Port
- 3 Step 1: Swap Out Your Charger’s Cable
- 4 Step 2: Charging Port Cleaning
- 5 Step 3. Device Opening
- 6 Step 4: Laptop Power Port Access and Swapping
- 7 Step 5: Repair the charging port before replacing it
- 8 Avoiding a Damaged Charging Port: Some Advice
- 9 Use a Wireless Charger
- 10 Final Thoughts
What may cause my Charger port to Malfunction?
Common causes of a broken charger port on your phone include water incidents, dust and dirt accumulation, wear and tear, loose connections, and mismatched chargers.
Over time, these can lead to corrosion or block the USB ports or connectors. Wireless charging may also be affected due to weakened electrical contacts.
Be sure to check for any physical damage before seeking service. If you find none, verify the voltage output from your device’s standard charger or try using another device’s charger for comparison. Properly matched voltage is vital for the overall performance of the charging port.
Tools Necessary for Fixing a Charging Port
Gather these tools to ensure a successful charger port repair: a screwdriver, soldering iron, compressed air canister, an old toothbrush, a backup charger, and extra screws.
With these in hand, you can delicately disassemble your device and detach the solder joints that bind the broken charger port.
Then use the compressed air canister to clear out any dirt or particles blocking it. Lastly, gently scrub with an old toothbrush for a thorough cleaning. Don’t forget to test with another USB cable or adapter before considering a professional repair service; sometimes, the issue is not the port but how your device charges.
Step 1: Swap Out Your Charger’s Cable
Before doing anything else, try swapping out your cable to see if that solves the problem. If your device is still not charging, it may be time to look at the charger port.
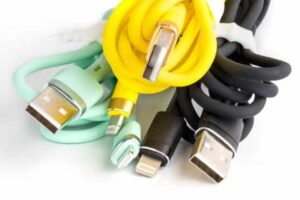
When dealing with a damaged charger port, it’s essential to know what can cause the damage and what steps need to be taken for repair. Here are some things that could cause damage:
• Overheating due to wrong charger or faulty wire
• Debris buildup resulting from long-term use of a mobile device
• Excessive force when plugging in or unplugging USB charger
You’ll need patience and attention to detail to fix a broken charger port. Before getting started, ensure you have all the necessary tools for repair, such as tweezers, screwdrivers, and soldering iron.
Step 2: Charging Port Cleaning
To get your device back in working order, a good cleaning of the charging port is usually necessary. Starting by using compressed air can dislodge any small debris.
If that doesn’t do the trick, you may need to use more precise tools like tweezers or a needle for extraction. Ensure not to use fibrous materials such as toothpicks, which can cause more harm than good!
Heat the metal wires around the power source contacts with an insulated wire while cleaning out any dust or lint that may be present.
Once all visible debris is removed from the charger port, your device should regain its much-needed connection and power source.
Step 3. Device Opening
Now it’s time to pry off the back cover of your device carefully. With a steady hand, remove the casing to reveal the inner workings of your gadget.
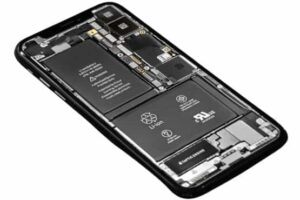
To fix the charging port, you must:
• Disconnect components:
• Detach all cables from the electrical contact points.
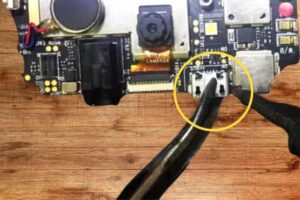
• Use a heat gun or soldering iron to loosen any solder holding them in place.
• Replace the port:
• Securely insert and solder in a new charging port.
• Consider using alternate charging options until the repair is complete.
• If you’re uncertain about performing such delicate work, consider enlisting customer service for assistance.
Follow these steps for successful charger port repair and breathe life back into your device!
Step 4: Laptop Power Port Access and Swapping
Gently unplugging the components near your laptop’s charging port is the next step in getting it up and running again! Carefully detach any wires or cables that are attached to the port.
Using a soldering gun, you can remove any remaining connections from the charging port. Then, move on to disconnecting the wireless charger, phone battery, and charging plug from their respective places.
Once all connections have been removed, carefully take out the old charger port and replace it with a new one. Ensure all its parts fit snugly into their designated areas before you put everything back together. With this procedure, your laptop should be ready to power up again!
Step 5: Repair the charging port before replacing it
Inspect the battery terminals for any misalignments and carefully realign them if needed.
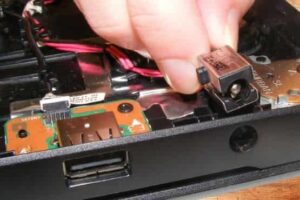
Check if the copper wire is in its original position and give it a slight nudge to make sure.
Connect your power adapter to see if it sparks the device; consider taking it to a service center or an expert. If all else fails, use electrical tape to cover exposed parts and secure everything before closing off your laptop.
With these simple steps, you can fix most charging port issues without replacing your device entirely!
Avoiding a Damaged Charging Port: Some Advice
To keep port problems at bay, it’s important to heed some simple tips.
• Avoid using your phone while it’s charging.
• Inspect the cable for signs of damage.
• Be gentle when inserting and removing the charger.
• Clean the port regularly with a soft cloth.
• Avoid third-party chargers.
Invest in a surge protector or use an emergency method like power banks or car chargers if you don’t have access to electricity.
Taking these precautions will help prevent any issues with your phone charger port.
Use a Wireless Charger
If your device’s charging isn’t working, go wireless and save yourself the hassle! Wireless chargers use electromagnetic induction to conveniently power up your phone without fiddling with cords. It is easy and fast: many wireless chargers can quickly charge your battery.
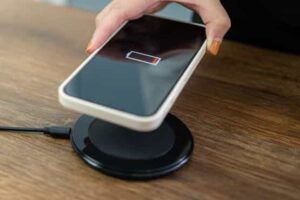
• Battery Packs: Free up space in your bag by carrying a lightweight battery pack instead of a bulky charger.
• Charging Pin: If the problem lies with an incompatible charger, try purchasing one with the correct pin type for your device.
• Charging Port Repair: If none of those work, the charging port may need to be fixed or replaced.
Wireless chargers are great for avoiding the hassle of broken ports and keeping your device running smoothly. With no more struggling with cords or incompatible chargers, you can enjoy tech convenience at its finest!
Final Thoughts
Now that you’ve tackled the issue, your iphone or Android is back in action and ready to go! Congratulations on fixing that pesky charger port. It’s not always easy, but it can be done with simple steps.
First, determine the problem with the charger port or the battery by checking if your device has a removable battery. If so, try replacing it. If not, check for any loose connections and look for any signs of corrosion.
Next, check the charger compatibility and make sure it meets your device’s voltage requirements. Try alternative charging options like wireless charging to see if that works better.


